Article: How to Avoid Lip Filler Migration
How to Avoid Lip Filler Migration
You loved your first half-syringe of lip filler. Six months later, you return for a touch-up and notice a soft bluish ridge above your upper lip border. It looks less like added volume and more like a faint shelf sitting in the vermilion area. You check it in the bathroom mirror, from the side, then in daylight, hoping it's only swelling.
That concern is understandable. Lip filler migration means hyaluronic acid gel has moved away from the intended lip tissue into the skin above, below, or beyond the natural border. It can create a visible shelf, a mustache-like shadow, blurred definition, or uneven fullness. Normal injection swelling is different. Swelling usually settles over days, while migration changes where fullness sits.
Prevention isn't one clever injection trick. It's a layered protocol involving the injector, filler selection, placement, volume, aftercare, and spacing between appointments. If one layer is ignored, the others have to work harder.
When Filler Ends Up Where It Shouldn't
The patient described above is a familiar example of how migration can appear gradually. Her first treatment looked natural, but a later top-up added product around tissue that still contained, or had been shaped by, earlier filler. The result wasn't necessarily caused by one dramatic mistake. It may have reflected cumulative volume, a changing tissue plane, or placement that didn't match the movement and structure of her lips.
A 2026 retrospective study of dermal injectable complications recorded filler migration in 3 of 31 complication cases, or 9.7%, and two of those migration cases followed lip augmentation specifically (2026 retrospective study of dermal injectable complications). The practical point isn't that migration is inevitable. It's that lip migration is a documented clinical complication, not merely a cosmetic annoyance seen in edited social-media photographs.
Swelling and migration aren't the same
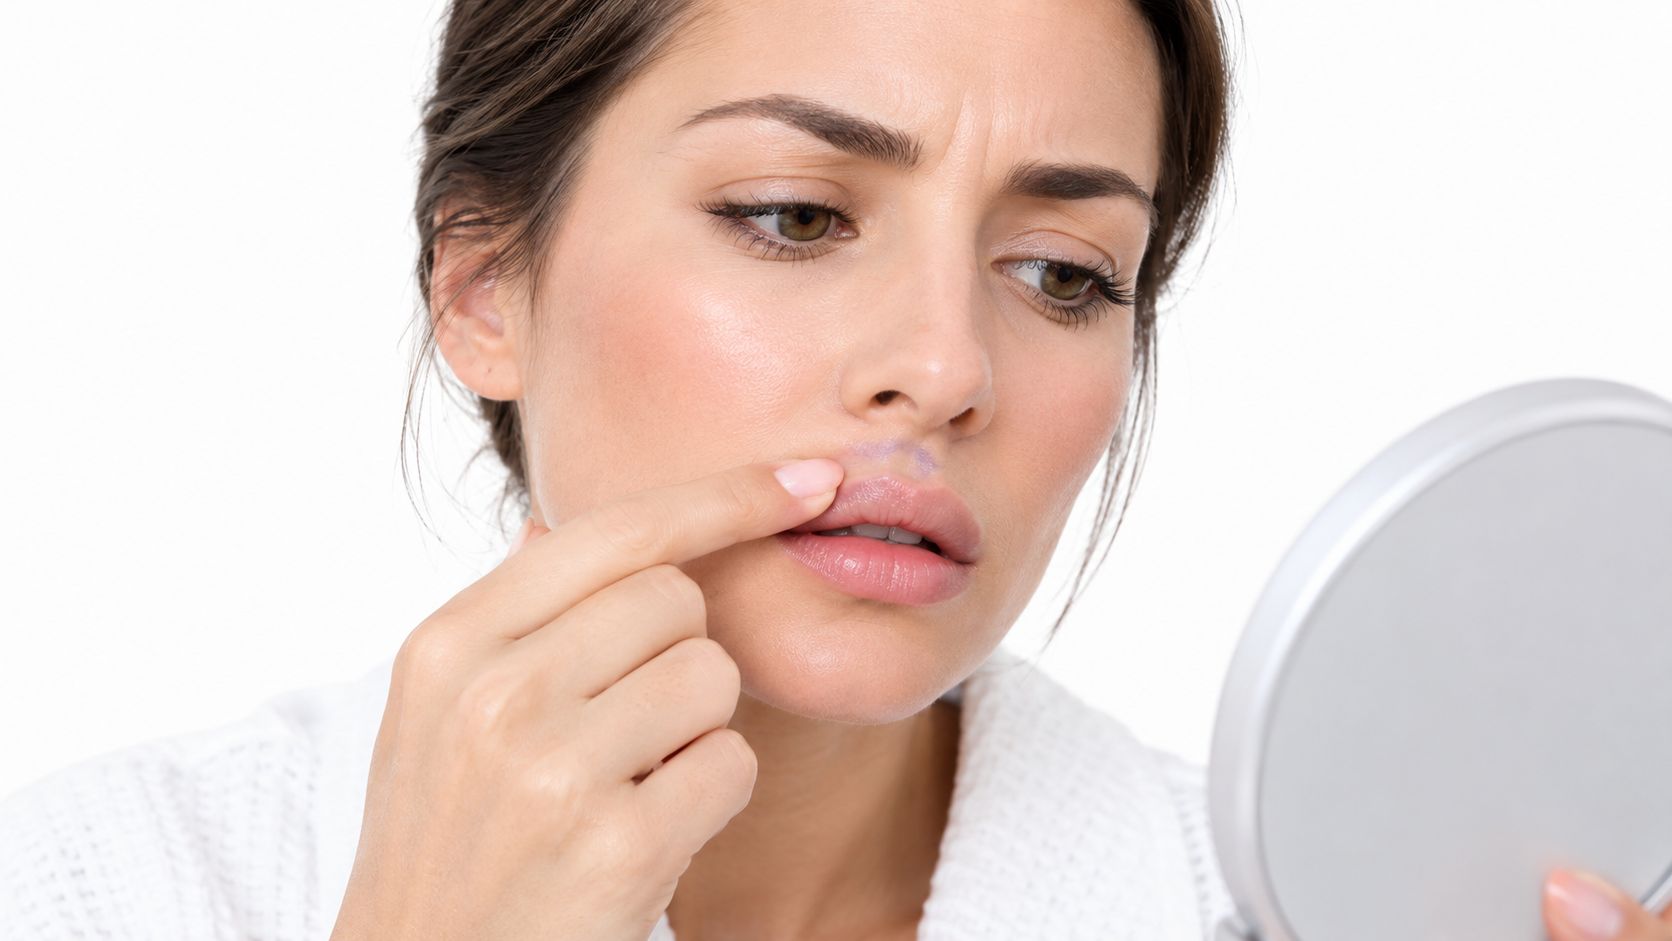
Immediately after treatment, lips can look uneven, feel firm, or appear larger than planned. Injection trauma and fluid shifts can temporarily distort the shape. A ridge that softens as swelling resolves is not automatically migrated filler.
Migration becomes more concerning when fullness remains outside the natural lip border, the upper lip develops a persistent shelf, or asymmetry becomes clearer after the early swelling phase. A bluish or gray cast above the lip can also suggest superficially placed hyaluronic acid, but only an in-person assessment can confirm what's happening.
Practical rule: Don't judge the final shape while the lips are acutely swollen, but don't ignore a persistent change in the wrong location either.
The prevention plan starts before the needle touches the skin. Choose someone who understands lip anatomy, use a product suited to mobile tissue, place it conservatively, protect the area during early healing, and avoid stacking sessions before the previous treatment has been properly assessed. That approach lowers risk without promising that every treatment will behave identically.
Choosing the Right Injector and Filler
A large social following isn't evidence of safe lip technique. I'd rather see a medical injector explain the anatomy, show consistent results from their own patients, and describe what they'll do if the product sits outside the intended border.
Vet the person before the product
Look for a licensed clinician with training in dermatology, plastic surgery, or aesthetic nursing, and ask specifically about lip augmentation rather than general injectable experience. Review before-and-after photographs taken by the practice, not only highly edited images. The best consultation should include an assessment of your natural border, muscle movement, existing filler, asymmetry, and goals.
Ask three direct questions:
- Product rationale: Which filler brand and formulation are you recommending, and why does it suit my lip tissue and movement?
- Volume plan: How much product will you use today, and what would make you stop before adding more?
- Correction plan: If migration appears, will you assess, dissolve, or reposition it, and how will you map existing product first?
For the product itself, lips generally need a flexible hyaluronic acid gel designed for movement. A softer, lower-G-prime formulation may integrate more naturally than a firm cheek-oriented filler. The evidence review of filler complications warns that high-G-prime products and short molecular-weight fillers may be poorly suited to thin, mobile lip tissue, particularly when clinicians over-inject or use the wrong plane.
How common lip options differ
Brand names don't replace an anatomical decision. Restylane Kysse is commonly selected when an injector wants a flexible lip-specific gel, while Juvederm Ultra XC is often discussed for smooth fullness and a softer feel. Their elasticity, cohesivity, and lifting behavior differ, so the correct choice depends on the lip, not a universal ranking.
| Filler Brand | G-prime / Elasticity | Best Suited For | Migration Risk Notes |
|---|---|---|---|
| Restylane Kysse | Flexible, lip-oriented behavior | Natural movement and lip definition | Risk still rises with excessive volume, poor plane, or superficial placement |
| Juvederm Ultra XC | Smooth, cohesive gel with soft fullness | Patients seeking supple volume | A thicker or excessive deposit can spread if the tissue is overfilled |
| Firmer cheek-oriented HA gel | Higher structure and lift | Structural support in less mobile facial areas | May feel or behave poorly in the lips when used off-label or in excess |
The goal isn't to choose the softest filler at any cost. Very soft products may provide less structural definition, while firmer gels may offer more lift but demand greater precision. A compatible product placed conservatively is safer than a fashionable product used without a clear anatomical rationale.
Why Injection Technique Matters Most
Product selection matters, but technique determines where that product lives. A suitable gel can still migrate if the injector uses excessive pressure, the wrong depth, an unsuitable vector, or more volume than the lip can support.
Angle and vector change the path
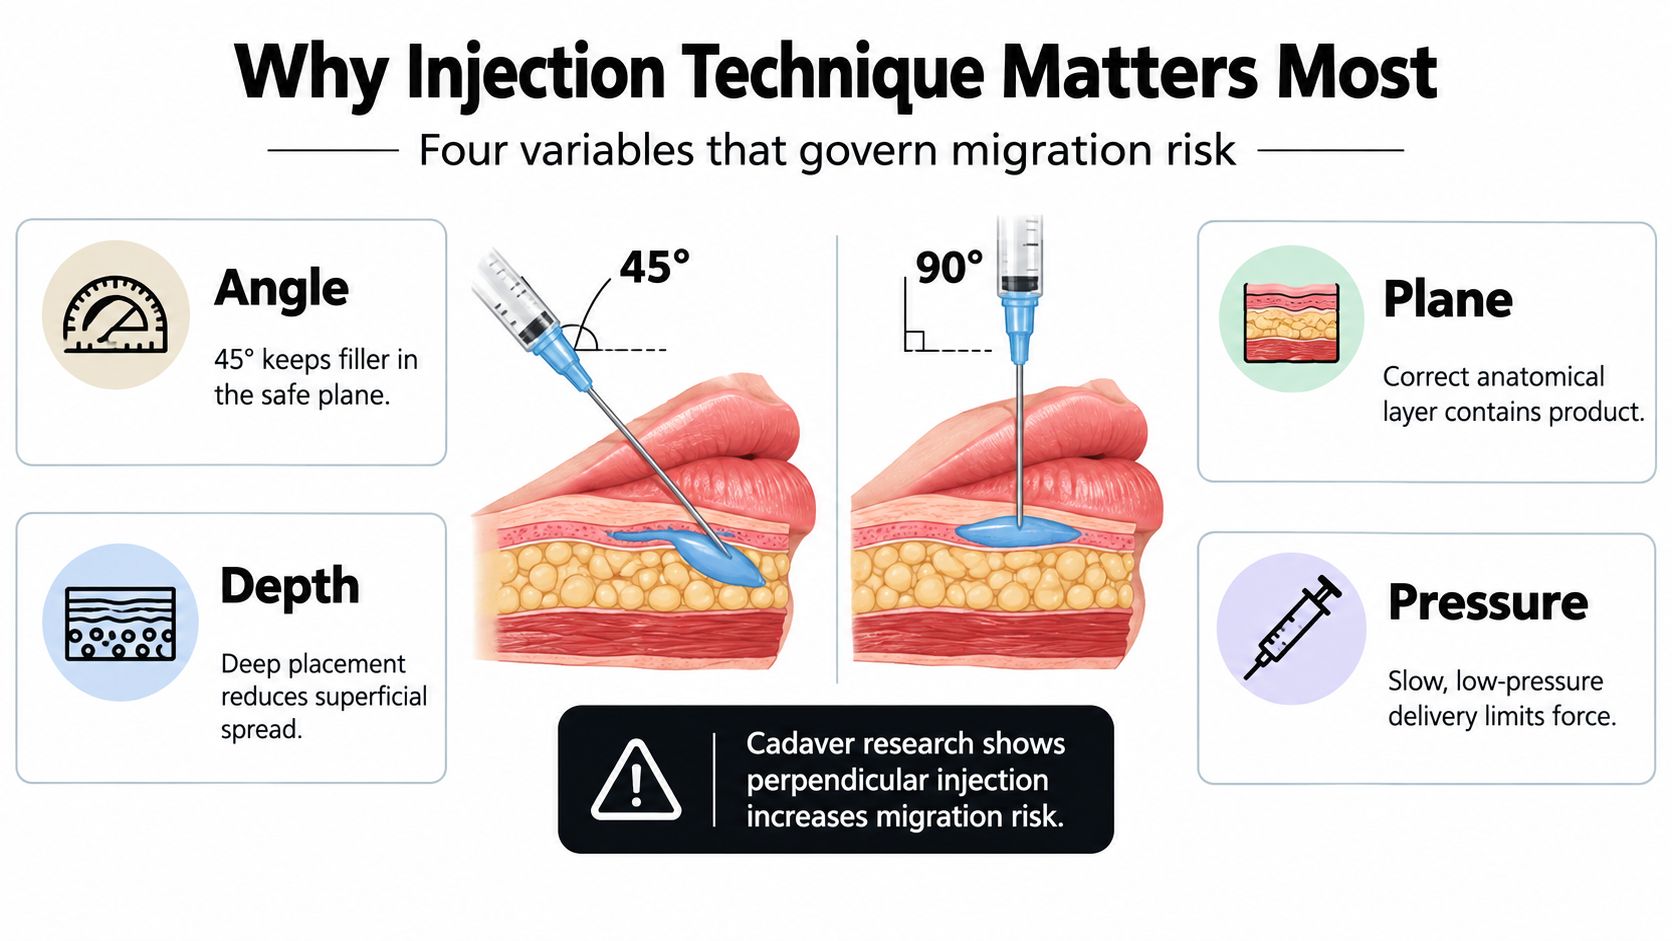
A retrospective study of 216 women found that injection vector materially affected migration outcomes. Angled injection, especially at about a 45-degree angle relative to the lip contour, was associated with significantly reduced migration, while a top-to-bottom approach produced the highest satisfaction when upper-lip migration was considered (retrospective study of 216 women receiving lip filler).
That doesn't turn 45 degrees into a universal prescription. Lip anatomy varies, and an injector may choose different vectors for the border, body, cupid's bow, or asymmetry. The principle is more useful than the number: the injector should plan the direction of product movement instead of forcing gel perpendicular to a mobile contour.
Depth, plane, pressure, and volume
Superficial placement can create visible ridges, beading, and a pale or bluish cast because product sits close to the skin. Deep placement isn't automatically safer, since the lips contain important vessels and structures. The injector needs to select the correct anatomical plane for the specific area, using controlled placement rather than chasing volume.
Pressure is another overlooked variable. A high-pressure, high-volume deposit can separate tissue and push gel along the path of least resistance. Small aliquots delivered slowly give the clinician more control and make it easier to stop before the surface becomes distorted.
Volume creates a similar trade-off. A peer-reviewed clinical review recommends using less than 1 cc to avoid overdone results, while another guide advises beginning with 0.5 to 1 mL for a first treatment and waiting at least 2 to 4 weeks before adding more (peer-reviewed review on conservative filler dosing). These figures aren't a substitute for examination, but they support a conservative starting point.
Cannulas may reduce bruising and allow smooth passage through a tissue plane, while needles can offer precise, localized placement around the border or cupid's bow. Neither tool guarantees a stable result. The operator's understanding of anatomy, depth, vector, and pressure matters more than the instrument alone.
For a deeper look at placement decisions, see lip filler injection techniques. The clinical takeaway is simple: technique, not product alone, determines where filler stays.
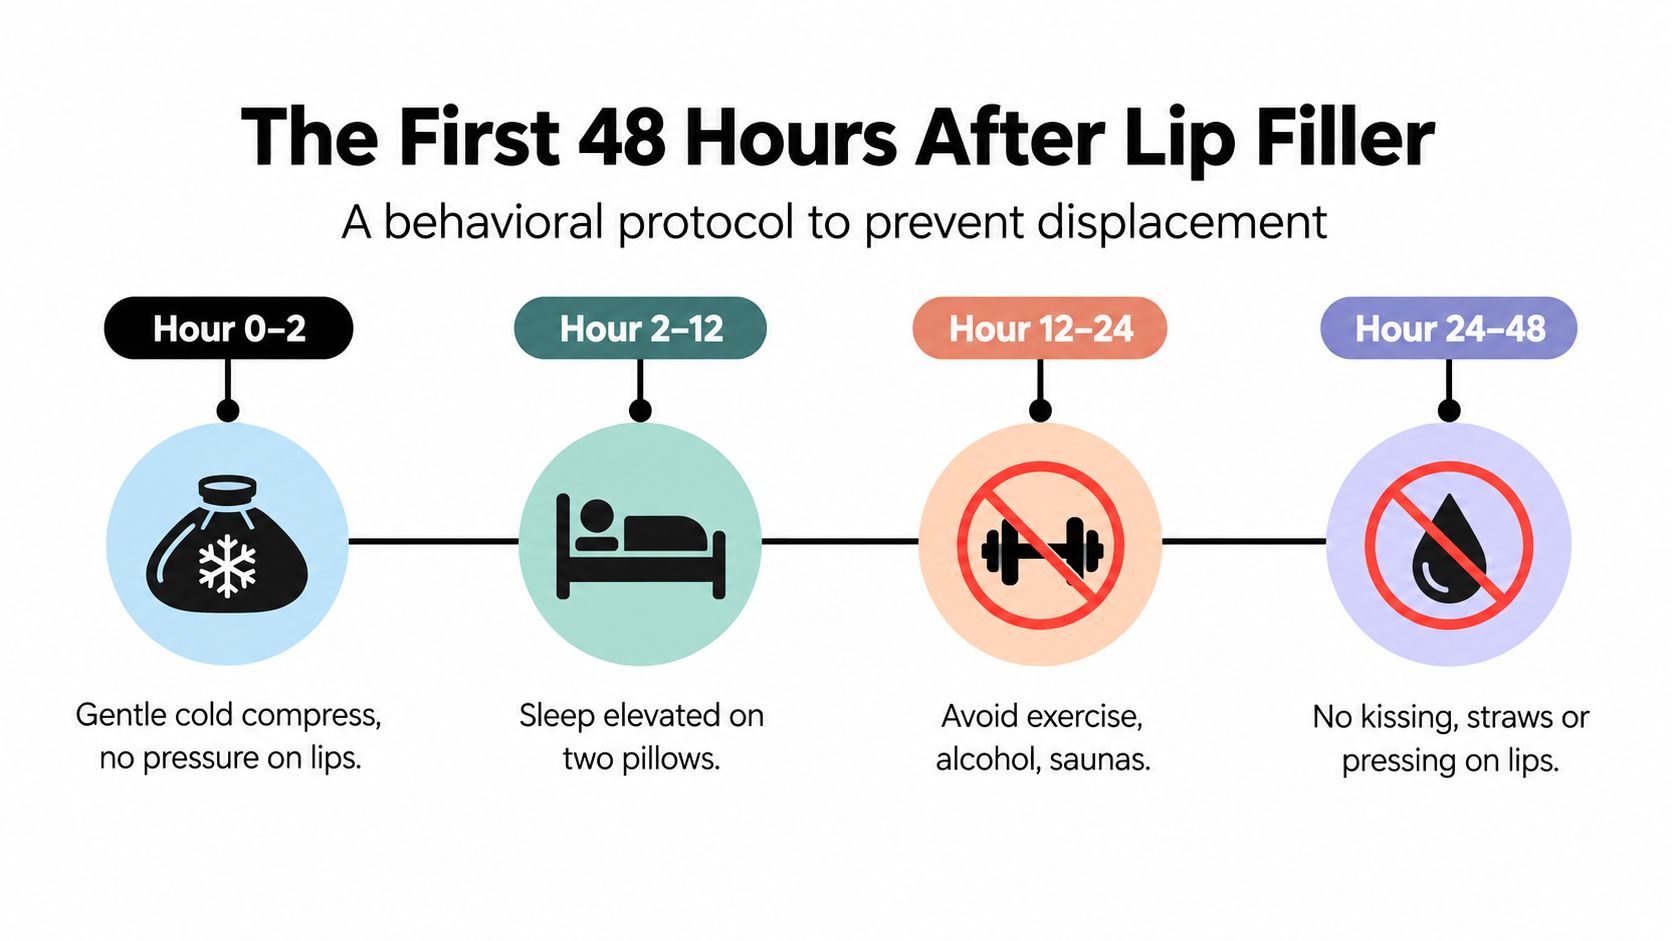
The First 48 Hours After Lip Filler
The early healing window deserves discipline because the gel and the surrounding tissue haven't fully settled. Your job isn't to massage the filler into place or keep checking it every few minutes. Your job is to reduce pressure, heat, friction, and exaggerated movement while following the injector's specific instructions.
What to do
Sleep on your back with your head propped up rather than pressing your face into a pillow. Use a cold compress intermittently, wrapped in a clean cloth, and rest it gently against the surrounding area without pushing on the lips. Keep your hands away unless you're cleaning the area or applying something your provider approved.
Stay hydrated and follow the practice's hygiene instructions. A major medical aftercare guide advises avoiding lipstick or lip balm, pressure, kissing, straw use, face-down sleeping, saunas, and similar stresses for at least 1 to 2 days after treatment (medical guidance on lip filler migration aftercare). If your injector gives a longer or more specific restriction, follow that advice.
What to pause
For the first 24 to 48 hours, avoid activities that increase heat, pressure, or repeated lip movement:
- Skip straws: The pursing action creates unnecessary mechanical stress.
- Avoid wide-mouth kissing: Direct pressure and stretching can disturb tender tissue.
- Limit exaggerated smiling: Normal conversation is different from repeatedly stretching the lips.
- Postpone dental visits: Mouth retraction and pressure around the lips can be disruptive.
- Skip facials and massage: Manipulation can move product before the area settles.
- Avoid saunas and strenuous exercise: Heat and increased circulation can intensify swelling.
- Don't fly within 24 hours: Delay travel so you can monitor symptoms and contact your provider if needed.
Normal swelling should gradually soften. Severe or worsening pain, marked discoloration, blanching, unusual coolness, or changes in skin color require prompt contact with the treating practice. Don't diagnose a complication from a social-media comparison photo. Send dated photographs to your injector and ask whether you need an in-person review.
The dermal filler aftercare guide can help you prepare questions, but your own injector's instructions take priority because they know the product, technique, and amount used.
Maintenance Sessions and the Stacking Trap
Many migration concerns develop through repeated small top-ups rather than one obviously excessive appointment. Each session adds volume, and earlier filler may not have fully disappeared when a patient returns. Previous product also changes the available tissue space and the placement calculations for the next treatment.
That's why a responsible injector may recommend waiting, reassessing, or dissolving before adding more. It can feel frustrating when you've booked a touch-up and hear, “We need to evaluate what's already there.” In practice, refusing to layer blindly protects the lip's shape and gives the clinician a clearer starting point.
Build a treatment record
Keep a simple record of:
- Appointment dates: Note when each treatment occurred and whether it was a full or partial syringe.
- Product details: Record the brand, formulation, and lot information if the clinic provides it.
- Placement map: Ask the injector to document whether product went into the border, body, or specific asymmetry.
- Response: Photograph the lips after swelling resolves and note any persistent fullness above the border.
Spacing decisions should be individualized. A patient seeking a refinement may need a different plan from someone who wants progressive volume. The key question isn't only, “Has enough time passed?” It's, “What remains, where is it located, and does adding more support the anatomy?”
Event pressure makes stacking especially tempting. Patients sometimes want a last-minute increase before a wedding, holiday, or photograph. That's when restraint matters most. A smaller adjustment with a clear review plan usually creates a more natural long-term result than chasing an immediate dramatic change.
The cost trade-off is real. Dissolving or restarting can mean another appointment instead of a quick top-up, but layering product into an uncertain tissue plane can make later correction more complex. Ask your injector to explain both paths before you commit.
Early Signs of Migration and What to Do Next
A defined ridge above the vermilion border can signal migration, but the pattern is not always obvious. Look for a mustache-like shadow, a duck-like projection that remains when your expression changes, asymmetry that persists after swelling subsides, or visible tracks and blanching.
These findings can also reflect swelling, a palpable deposit, or an uneven anatomical contour. Do not squeeze the area or massage it forcefully. A clinical review of lip filler migration associates superficial or deep placement, unsuitable technique, and excessive product with asymmetry, lumpiness, beading, and nodules. An examination is needed to identify the cause.
Learn more about the causes and likelihood of movement in this guide to whether fillers migrate.
A sensible response sequence
- Record the timeline: Take front, side, and three-quarter photographs in consistent lighting. Note the treatment date, when swelling changed, and when the fullness first appeared.
- Contact the original injector: If the shape remains concerning, reach out within 7 to 14 days, unless urgent symptoms call for faster care.
- Arrange an examination: A hands-on assessment can distinguish swelling, misplaced product, and an anatomical contour issue more reliably than photographs alone.
- Discuss the options: Ask whether observation, professionally advised massage, partial hyaluronidase dissolution, or another approach fits the finding.
- Preserve suitable filler: Ask the injector to map the remaining product before dissolving anything. Correctly placed filler may not need removal.
Hyaluronidase breaks down hyaluronic acid filler. A targeted or partial treatment may reduce a migrated pocket while preserving areas that still look good, but the injector must monitor enzyme activity and the tissue response. Dissolving is not a reason to refill immediately. One carefully planned correction is preferable to repeated dissolving and refilling, which can create another uncertain layer.
Seek urgent medical attention for severe pain, skin blanching, gray or dusky discoloration, or visual symptoms. These signs require prompt clinical evaluation rather than routine migration management.
Your Prevention Checklist and a Healing Companion
Use this checklist before booking, during the consultation, and after the appointment. It's portable because the decisions that prevent migration happen across the entire treatment process.
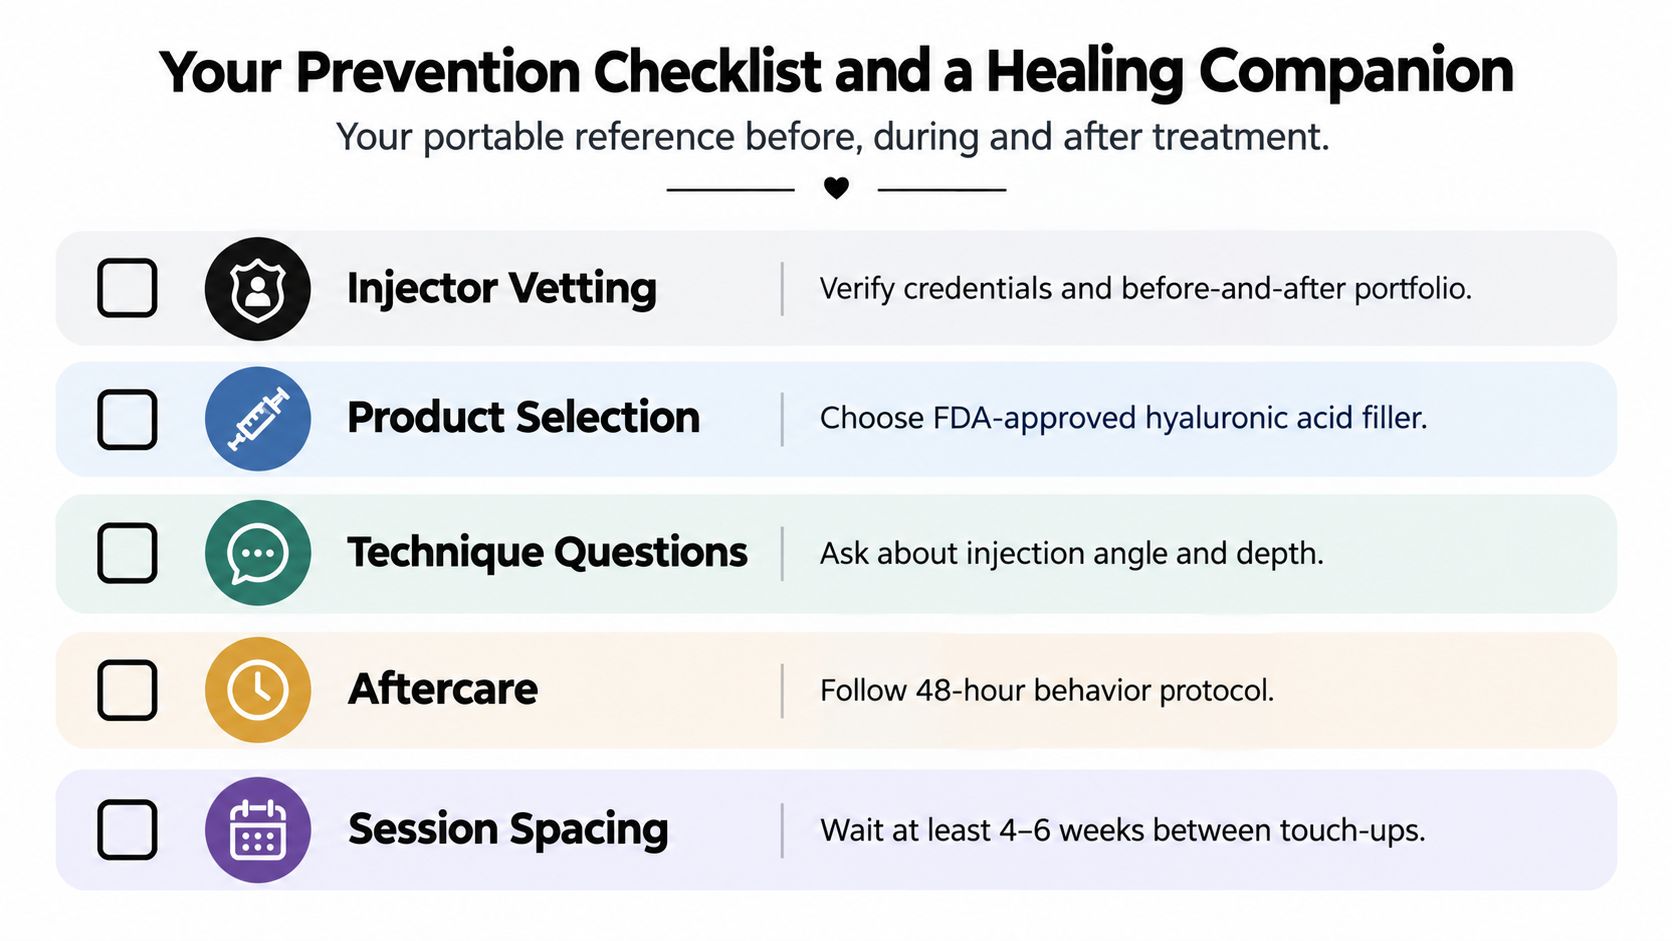
- Injector vetting: Confirm medical credentials, lip-specific experience, and a portfolio of the injector's own results.
- Product selection: Ask for a reversible, medical-grade hyaluronic acid filler with a rationale suited to your anatomy.
- Technique questions: Ask about the planned plane, direction, pressure, and how the injector will control volume.
- Aftercare: Arrange time to follow the first 1 to 2 days of pressure, heat, movement, and hygiene restrictions.
- Session spacing: Don't schedule automatic top-ups. Have the injector reassess the previous result and any remaining filler first.
LED support during recovery
An LED facial mask isn't a migration treatment, and it can't compensate for poor placement or excessive volume. Used appropriately, red light around 633 nm may support a calmer recovery environment, lymphatic movement, and overall tissue quality while the skin settles. It belongs beside good technique and aftercare, not in place of them.
A typical routine may involve 10 to 15 minute sessions a few times weekly during the first two weeks after injections, followed by ongoing use for skin maintenance. Active swelling, tenderness, or unusual symptoms are reasons to pause and ask the treating provider before using any device over the area.
The BotoxBarb Facial Mask is a wireless option designed for comfortable wear across the face and includes three lighting settings for different treatment goals. Use it only when your injector agrees that light therapy is appropriate for your current healing stage. For simple dryness outside the treated area, a gentle resource such as this DIY balm for chapped lips may be useful, but avoid applying any product your provider hasn't approved directly over fresh injection points.
A stable result comes from cumulative restraint. Choose the right clinician, use a compatible product, respect the tissue plane, protect the lips while they settle, and treat every maintenance visit as a new anatomical assessment rather than an automatic refill.
BotoxBarb offers consultations and aesthetic services including Botox, Dysport, dermal fillers, LED light therapy, and PRP, alongside medical-grade skincare for ongoing maintenance. If you're considering lip filler or want a careful review of a previous result, visit BotoxBarb to explore appointment options and supportive products.