How Long Does Filler Take to Dissolve with Hyaluronidase?
Visible softening can begin within the first hour after hyaluronidase, with substantial measurable breakdown occurring within 24 hours. Highly cross-linked fillers can take longer and sometimes need a second dose, so a swollen appearance the next day doesn't automatically mean treatment failed.
The important distinction is between filler breaking down and tissue no longer looking swollen. Those processes don't finish together, and judging both by the same clock can lead to unnecessary worry or premature retreatment.
How Long Hyaluronidase Takes to Dissolve Filler
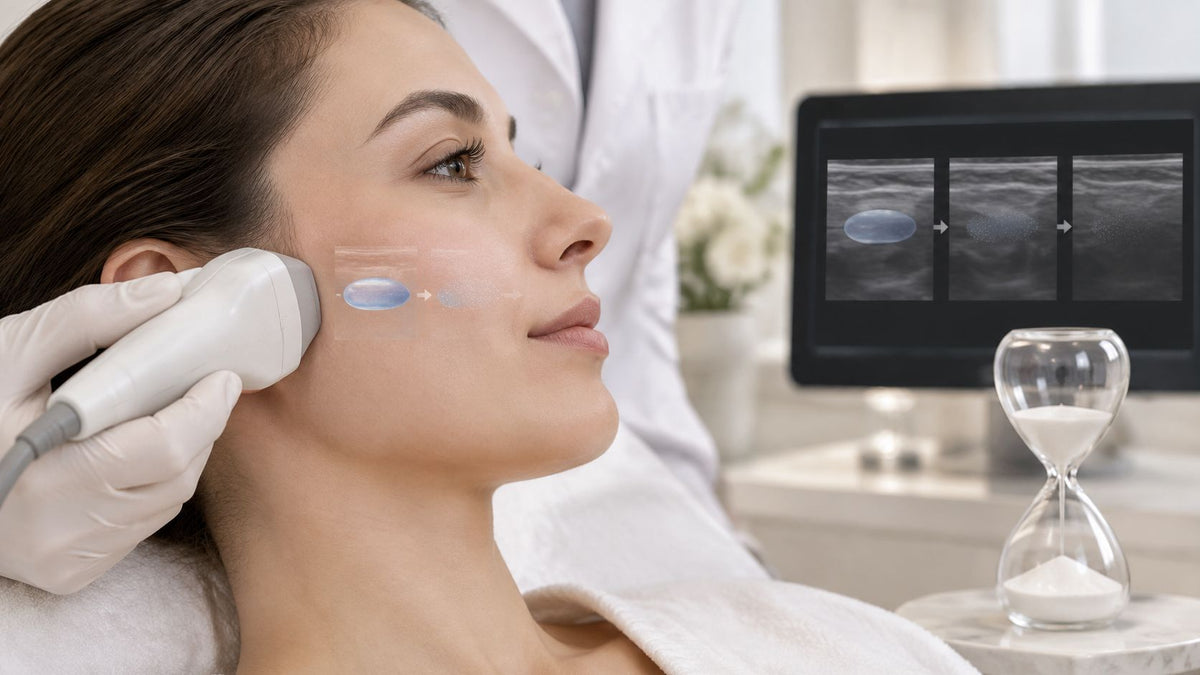
Hyaluronidase can start reducing hyaluronic-acid filler quickly, but visible softening isn't proof that all the product has disappeared. In a 2024 ultrasound-guided investigation published in the Journal of Cosmetic Dermatology, measured filler volume decreased by 64.1% within the first hour and 81.7% by 24 hours.
That's a substantial early change, not a guarantee of complete removal. The investigators measured filler volume, which isn't the same as measuring how settled someone's lips, cheeks, or under-eyes look in a mirror.
Filler dissolution timeline after hyaluronidase
The following windows are reference points, not deadlines for your face.
| Time after hyaluronidase | What research shows | What it means in practice |
|---|---|---|
| 0-60 minutes | The ultrasound investigation found the largest single early drop, about 64.1% of measured filler volume | Early softening may be visible, but the final result isn't clear |
| 1-3 hours | Laboratory work found the largest degradation between 30 minutes and 3 hours | An early review can help the clinician assess response |
| 3-9 hours | Repeated dosing dissolved all 21 tested fillers by 9 hours in a laboratory protocol | Resistant gels may need longer exposure before judging response |
| 9-24 hours | Total measured volume reduction reached 81.7% by 24 hours in the ultrasound investigation | Examination matters more than appearance alone |
| 24-72 hours | The cited laboratory findings describe breakdown through the first day, not a universal endpoint for this later window | Arrange review and consider ultrasound if unexplained fullness persists |
The laboratory figures come from a study evaluating hyaluronic-acid fillers, using 20 units every 30 minutes for three hours, totaling 120 units. All 21 fillers dissolved by nine hours, while the investigators also reported that 15 of 24 evaluated filler products required more than three hours.
Those reported groups shouldn't be treated as interchangeable counts. Even more significantly, a gel in a laboratory isn't surrounded by living tissue, so its dissolution time isn't an appointment-room promise.
Start the clock at injection
For planned cosmetic correction, expect your clinician to explain whether an assessment at about one hour and another at day one or two would be useful. These are opportunities to assess response, not automatic appointments for additional enzyme.
Practical rule: Ask what your clinician will examine before deciding whether more hyaluronidase is needed.
If you're weighing active reversal against just allowing filler to fade, Chernoff Cosmetic Surgery's resource lets you compare dermal filler longevity. Natural filler longevity and enzyme-assisted dissolution are different timelines.
Factors That Change Dissolution Speed
Think of hyaluronidase as a key made for a particular lock. The relevant material is hyaluronic acid, but manufacturers connect its chains differently, making some gels more resistant to breakdown than others.
Cross-linking helps filler maintain its structure. A tightly connected gel may need greater enzyme exposure than a less resistant formulation, and its response can't be predicted from the treatment area alone.
Factors that shorten or lengthen filler dissolution
| Factor | Shorter dissolution | Longer dissolution | Evidence note |
|---|---|---|---|
| Cross-link density | More susceptible, lightly cross-linked products | Highly cross-linked monophasic gels | A standardized protocol found no detectable effect on a highly cross-linked formulation |
| Enzyme dose | Some fillers responded to 100 units within 30 minutes | Resistant fillers needed 300 units and up to 1 hour | Product resistance and enzyme amount interact |
| Repeated exposure | An adequate initial exposure for susceptible gels | Repeated dosing for resistant gels | Laboratory protocols have used 20 units every 30 minutes |
| Placement depth | Filler the enzyme can contact directly | Deep or intramuscular deposits with uneven contact | Distribution can complicate targeted treatment |
| Vascularity and edema | Tissue conditions that allow clearer assessment | Altered blood flow or post-injection edema | These can extend apparent resolution |
| Volume | A smaller, well-targeted deposit | A larger depot requiring broader contact | Laboratory volumes don't directly translate to clinical dosing |
A standardized in-vitro comparison indexed in PubMed found no detectable effect on one highly cross-linked formulation under its protocol. That doesn't mean the product can never be dissolved. It means a particular exposure wasn't enough to demonstrate breakdown under those conditions.
Dose matters, but there isn't a universal formula
In a 2025 Journal of Cosmetic Dermatology study, some fillers dissolved within 30 minutes using 100 units of recombinant hyaluronidase, while the most resistant required 300 units and up to one hour. A separate published report described complete dissolution within one to two hours using 600-750 units.
These aren't competing prescriptions. Different filler quantities, formulations, enzyme preparations, and testing conditions prevent direct dose-for-dose comparisons.
Don't use laboratory numbers to request a particular dose. Your clinician needs to match treatment to the actual deposit and your clinical situation.
The enzyme also needs to reach the filler. Say a deposit extends deeper than its visible surface bump suggests: treating only the superficial portion may leave material untouched.
Bring the product name, placement records, and approximate treatment age when available. Those details help the clinician investigate what remains rather than assuming every persistent contour needs a larger dose.
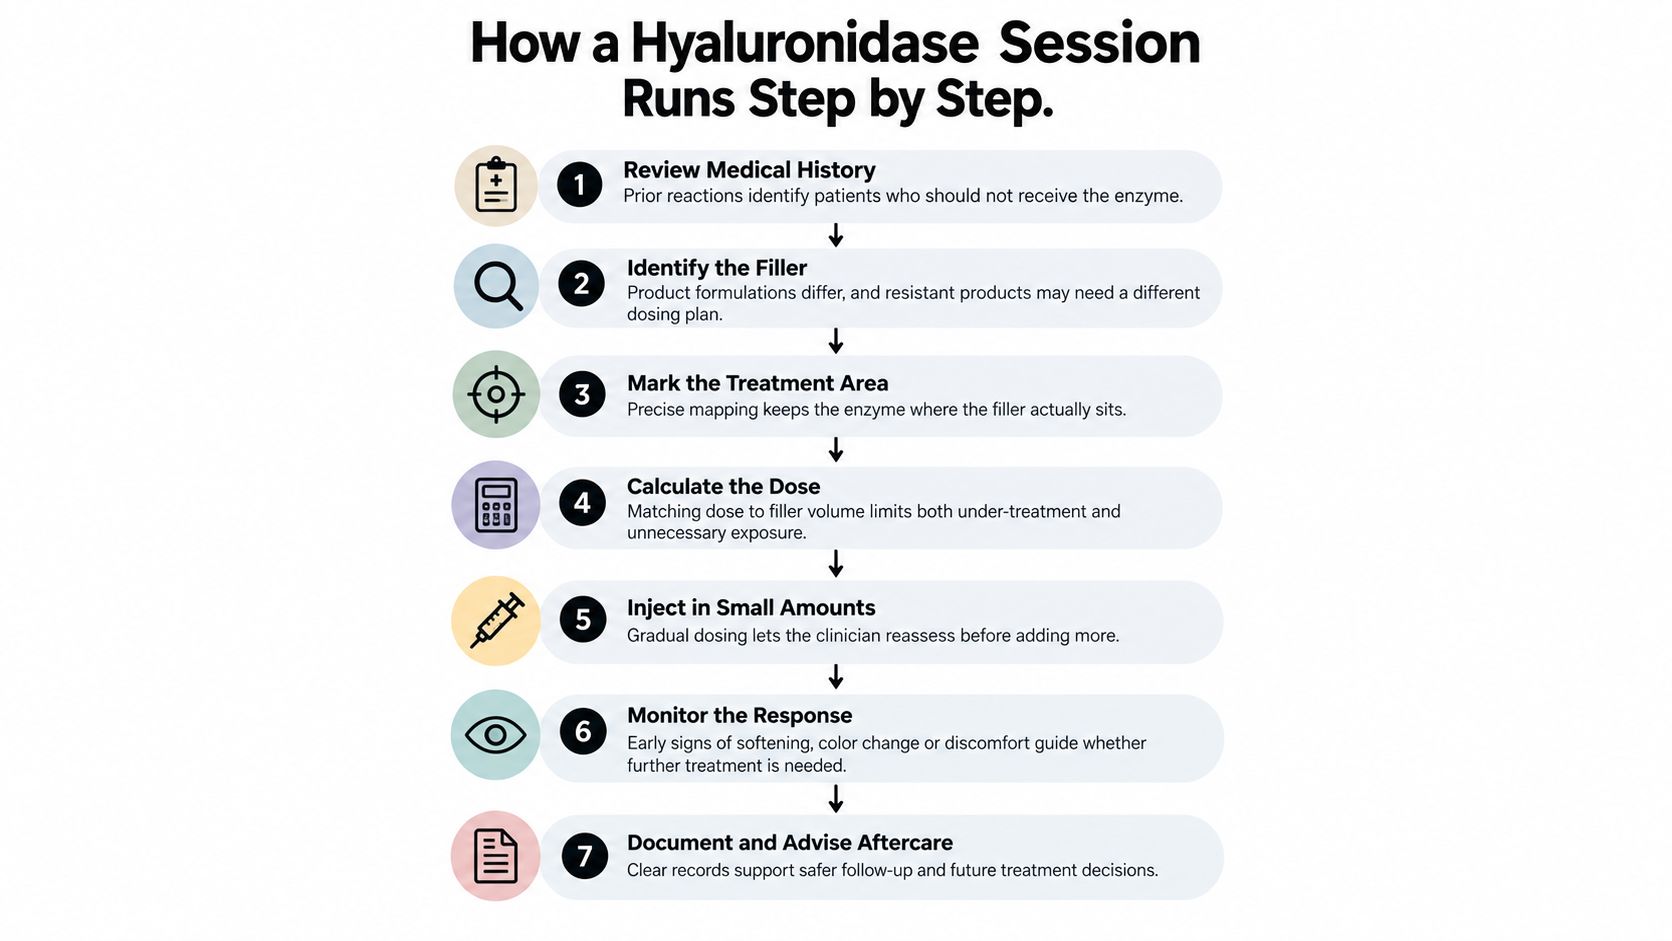
How a Hyaluronidase Session Runs Step by Step
A careful session starts with identifying what needs correction, not selecting a syringe. The clinician should establish whether you're seeking partial refinement, broader removal, or assessment of a possible complication.
The dermal fillers procedure guide provides context for the original placement process. For dissolving, records of that placement can help distinguish the intended result from the area you now want changed.
What your clinician should establish
- Review medical history and allergies. Tell the clinician about previous hyaluronidase exposure, any reaction, and current medications. A prior reaction can change whether treatment is appropriate and what precautions are needed.
- Identify the filler. Bring the brand, approximate age, injection location, and injector's notes if available. Hyaluronidase targets HA filler, not every injectable material, so an uncertain product history needs attention before treatment.
- Photograph the baseline. Standard lighting, a relaxed expression, and matching camera angles make later comparisons more useful. Otherwise, shadows or a different head position can resemble a change in volume.
- Decide whether ultrasound would help. Imaging can help map a suspected deposit and its spread when examination alone isn't clear. This is particularly useful when the visible contour doesn't explain where the material sits.
- Choose the enzyme and dose. A 2025 experimental study in Aesthetic Surgery Journal found significantly greater filler degradation with recombinant than animal-derived hyaluronidase after one hour. That experimental finding informs product discussion, but it doesn't establish one preparation or dose as right for every patient.
Treatment and documentation
- Target the filler deposit. The clinician places enzyme where the material is located rather than relying on injection into nearby tissue. Accurate contact matters when the aim is selective correction rather than broad removal.
- Assess the early response. Compare the treated area with baseline photographs and examine softness, contour, discomfort, and skin appearance. An early cosmetic change is only part of that assessment.
- Repeat only for a clinical reason. Additional dosing requires evidence or a strong clinical judgment that treatable filler remains. Laboratory repeat-exposure intervals aren't a standing schedule for elective patient treatment.
- Arrange follow-up and record aftercare. For elective correction, a review at 24 to 48 hours can help assess the evolving response. Ask for a record of the enzyme preparation, amount, injection sites, and symptoms observed.
Each decision can affect what happens next. Keep the treatment record accessible, especially if a different clinician will perform your follow-up.
Dissolved Versus Swollen and What Residual Fullness Means
Dissolved filler does not mean the swelling has settled.
Think of a sponge that's been wrung out but is still damp. Much of its water has left, yet the material hasn't dried; similarly, reduced filler volume doesn't instantly restore the surrounding tissue's settled appearance.
The analogy isn't exact, but it helps separate product breakdown from tissue recovery. A full-looking area may contain less filler than it did before treatment.

What persistent fullness can represent
Imaging-focused evidence on filler assessment describes heterogeneous distribution, unintended intramuscular placement, spread along tissue planes, and partial rather than complete loss of detectable material after treatment. It also notes that there are no consensus ultrasound criteria defining complete resolution.
That means neither a mirror nor an ultrasound image offers a universal present-or-gone answer. Your clinician must interpret findings alongside symptoms, treatment history, and examination.
Possible explanations include:
- Residual filler: Material remains in part of the treated deposit.
- Post-injection edema: Fluid-related swelling obscures the contour.
- Inflammation: Tissue irritation contributes to fullness or tenderness.
- Fibrosis or altered tissue architecture: Changes in the surrounding tissue affect its feel or shape.
- A combination: More than one explanation can apply.
Compare change, not isolated snapshots
Day-one judgments can be misleading because edema may conceal the underlying result. Use photographs taken in the same lighting and note whether the area feels softer over time, without repeatedly squeezing it.
The guide to swelling after filler helps explain why appearance alone can be difficult to interpret. For context about swelling after initial placement, ProMD Health Easton's Juvederm recovery timeline distinguishes settling from the longer-term cosmetic result.
Neither resource replaces an examination after dissolving. If the explanation remains unclear, ask whether imaging would change the treatment decision rather than requesting another injection solely because the area still looks full.
Warning Signs That Need Urgent Care
Mild swelling that gradually improves is generally a nonurgent follow-up issue. Severe pain, pale or mottled skin, visual symptoms, and breathing difficulty are different. Don't wait for a scheduled review.
A pale or dusky area can indicate reduced blood flow, which can threaten tissue. New vision changes require emergency assessment, even if the cosmetic treatment area doesn't look dramatically different.
Symptoms after hyaluronidase sorted by urgency
| Symptom | Typical meaning | Action |
|---|---|---|
| Severe or escalating pain | Possible reduced blood flow or significant inflammation | Urgent: contact your clinician or emergency care now |
| Skin turning white or pale | Possible reduced blood flow to treated tissue | Urgent same-day medical assessment |
| Mottled, blue-grey, or dusky skin | Possible compromised circulation | Urgent assessment the same day |
| Vision changes, double vision, or eye pain | Possible vascular involvement near the eye | Emergency care immediately |
| Hives, spreading itch, or trouble breathing | Possible allergic reaction | Emergency services for breathing trouble; promptly call the clinic for a rash |
| Firmness, mild swelling, or tenderness that gradually improves | Residual edema or remaining filler | Nonurgent; reassess at the scheduled review |
| Lumps or asymmetry persisting beyond a few days | Residual filler, fibrosis, or uneven distribution | Clinician examination, with ultrasound if needed |
These categories guide action, not self-diagnosis. If symptoms are progressing or you can't determine whether they're urgent, seek medical advice rather than testing the area with pressure or massage.
Safety first: A cosmetic concern can wait for a planned review. A possible circulation problem or serious allergic reaction cannot.
Risks to discuss before additional treatment
Dissolving isn't free of trade-offs. A clinician should discuss both the intended correction and the possibility of an unwanted result.
- Incomplete dissolution: Some unwanted material may remain.
- Unwanted volume loss: Treatment may remove filler you preferred to keep.
- Asymmetry: Uneven correction can leave different contours on either side.
- Injection-site infection: Increasing redness, warmth, discharge, or feeling unwell needs clinical assessment.
The dermal fillers side effects guide provides broader context for recognizing post-injection concerns. Don't assume a symptom is harmless just because it also appears on a list of possible side effects.
When you call, give the clinic the filler product name, original injection date, time of hyaluronidase treatment, and exact symptoms. Describe when they began and whether they're spreading or intensifying.
For breathing difficulty, throat swelling, faintness with a spreading reaction, or visual changes, contact emergency services immediately. Don't delay emergency care while waiting for the injector to return a message.
Follow-Up Timing and Reassessment Before Any Second Dose
The first two weeks give you useful points for comparing photographs, firmness, and contour. Use the schedule below as an elective follow-up framework, not a promise that swelling will be gone or the result final by a set day. Filler may have dissolved while swelling still makes the area look full, so assess the two changes on separate clocks.
Urgent symptoms take priority over a planned review. Your clinician may also suggest an earlier appointment based on why the filler is being dissolved.
Recovery and follow-up schedule after hyaluronidase
| Window | What to do | What to report |
|---|---|---|
| First 2 hours | Stay reachable by phone. Avoid pressing or massaging unless instructed. Keep baseline and follow-up photos. | Any warning sign from the urgent table |
| Day 1 | Follow clinic advice on cooling and activity. Avoid heat treatments unless cleared. | Persistent pain or any colour change |
| Days 2-3 | Take photographs in matching lighting and note firmness. | Lumps or fullness that do not change |
| Days 7-14 | Attend clinical reassessment. Ultrasound may help if residual filler is suspected. | Persistent asymmetry or fullness |
| Week 3 onward | Discuss with your clinician whether to repeat treatment or resume your filler plan. | Recurring fullness or a wish to change the result |
Pair “how long does filler take to dissolve with hyaluronidase?” with a practical question: What finding would justify more treatment? Ask your clinician to explain what suggests filler remains before you agree to another dose. At an early check, swelling can still obscure the result, much like a temporary cover over the area being assessed.
Choose the next step from the examination
- Wait with guidance if the area is improving and symptoms are not urgent. Keep the planned review, and avoid repeatedly checking or manipulating the tissue.
- Reassess, potentially with imaging, if fullness remains unchanged at the planned review or lumps look uneven. The examination helps distinguish residual filler from fullness that has not yet settled.
- Consider repeat hyaluronidase only if your clinician judges that HA filler remains and further correction is appropriate. Agree on the desired endpoint so treatment stays within your goal.
At-home LED devices do not replace hyaluronidase, dissolve filler, or shorten the recovery timeline. Use any device only if your clinician says it is appropriate.
Bring a clear record to your review
Prepare these details before your visit:
- Matching photographs: Baseline and follow-up images in consistent lighting.
- Filler details: Product name, approximate age, original injection date, and placement records.
- Dissolving details: Treatment time, enzyme information if available, and symptoms since treatment.
- Specific questions: Ask what may remain, whether ultrasound would help, and what findings would support another dose.
You do not need to decide for yourself whether remaining fullness is filler before booking. A clinician can examine the area and explain whether it appears to be residual product, swelling, or another change.
BotoxBarb offers in-clinic dermal filler services and appointment booking to discuss unwanted filler and the next treatment decision. Visit BotoxBarb to arrange a reassessment, and bring your photographs, treatment records, and questions about residual filler or further dissolving.